So, what have I learned lately? Well, the day before my MIL's 90th bday party I decided that little AC's dress needed a slip to go underneath it. Luckily, I had purchased a pattern from Martha Pullen, Fancy Slip and Panties, which would work. Plus, at my last MP event I had purchased some extra fabric and I had won some free lace that would work perfect for the slip. The slip was easy to put together but I didn't do it exactly as the instructions suggested. Because the dress I made, had a wide arm hole and lower neckline, I was afraid that the lace at the neck and arms would peak through. That's not what I wanted. I needed to finish off the neck and arm seams a bit differently. I decided to set my serger, Pfaff 788, to a flat rolled hem. This is where the learning started. I'd never done this before on my serger. In fact, I think I'm like most people who have a serger... I'm terrified to move any of the setting for fear it will not work again. I'm slightly comfortable with changing the thread but remove one of them or even remove a needle??? Are you kidding me? On any normal day, I'd say "No, way! Stay the heck away from my serger." Who knows what possessed me but I did give it a whirl. I 1st tried the 3-thread rolled hem and I thought it was too bulky. Then I tried the 2-thread rolled hem. Just perfect! I followed the manuals instructions and had no problems. Of course, I must admit that I have yet to put it back to a regular 4-thread serger stitch but that's beside the point! When I serged the 2-thread rolled hem on both the neck and arm seams, I did not shave off any of the fabric. I just serged the edges and then took it over to my Viking Designer Diamond. (Before I forget, I also used the 2-thread rolled hem to attach the lace to the ruffled trim at the bottom of the slip.)
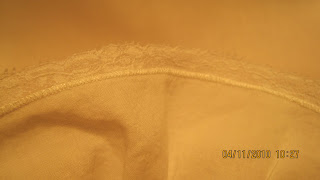
I turned the serged hem over about 1/4" and then used the shell edging stitch (#26) to finish the edges.
I was happy with my 1st attempted at using the shell edging stitch. Here's what the slip looks like:
I also decided to use French seams for the side and shoulder seams. The Fancy Slip pattern had instructions on how to do French seams but I had just tried them with the dress and was happy with the results. I decided to stick to those instructions (Kari Mecca's Sewing with Whimsy) because I had been successful the 1st time I tried it. I did briefly look at slip instructions for french seams and they did seem easy to follow.
I chose to put some embroidery on the slip to dress it up a bit more. I made this decision BEFORE I sewed the side seams. Basically, right after I cut it out. I chose white on white so that it makes the design more subtle. I used Martha Pullen's 2009 May Redwork design for the slip front. Since the design is approximately 3.5" tall, I knew that I wanted the design to start no farther down then 2" from the neckline. Since I still had to finish the neckline but I wasn't sure how much the seam was going to take, I just measured 2" down from the neck edge and marked it with a disappearing ink. To center the design, I folded the slip front in half (side seams together), marked where it reached the 2" neck mark and then came down another 1.75" to make the final CENTER mark. Since the design is 3.5 inches tall, I needed to find the center point (3.5/2= 1.75"). I used Floriani Perfect Stick because I don't have to "hoop" in the traditional sense. Perfect Stick has a sticky side which allows you to just place your fabric onto the hoop without having to stretch it into your hoop and get it perfectly aligned. I use Perfect Stick a lot! I take the appropriate hoop and trace the hoop size onto the back of the Perfect Stick and cut it out. I then remove the relief paper which exposed the sticky part. I place the stabilizer on a table with the sticky side up and then put my hoop on top of the sticky stabilizer in the shape of my hoop. I make sure that it's properly covering all corners of the hoop. I put my hoop onto my machine and then I can just drop my fabric onto my hoop and smooth it out. If I don't get it aligned right the 1st time, it's VERY easy to pick it up and readjust. Super simple and I love this technique! In fact, I started the embroidery design and then ran out of the house to go to the movies with the family. When I came back, it was all finished and looked like this...
I like the design because it's delicate and that's what I wanted for little AC's slip.
For this little sewing project, I learned how to use my rolled hem on my serger and that I love stitch #26 (shell edge) on my Designer Diamond.
Credo,
Lisa


No comments:
Post a Comment