Pinterest

Thursday, March 31, 2011

The little gathered clutch purse

Hi there!

  I saw this great little clutch tutorial that Anna from Noddlehead created and fell in love with it. You must visit Anna's site, it's packed full of great stuff. Here's the link for her great tutorial. I added a strap to mine but that's the only change I made. Also, I used things I had on hand. My zipper was longer then the one Anna calls for. I just clipped off the bottom end to make it work. The one tip I think is important to note is that having your zipper portion (with the tabs included) be exactly 8.5" because the fabric pieces are cut to work with that length. She has this in bolded type but I thought it was worth mentioning again. So, here's my little gathered clutch purse... The front

The back:


Inside:


There were 2 credit card slots and a divider down the middle:

Credo,
Lisa

Wednesday, March 23, 2011

Toddler Dress - Simplicity 5695

Hello!

  I just finished using Simplicity 5695 to make a summery dress for lil' AC.

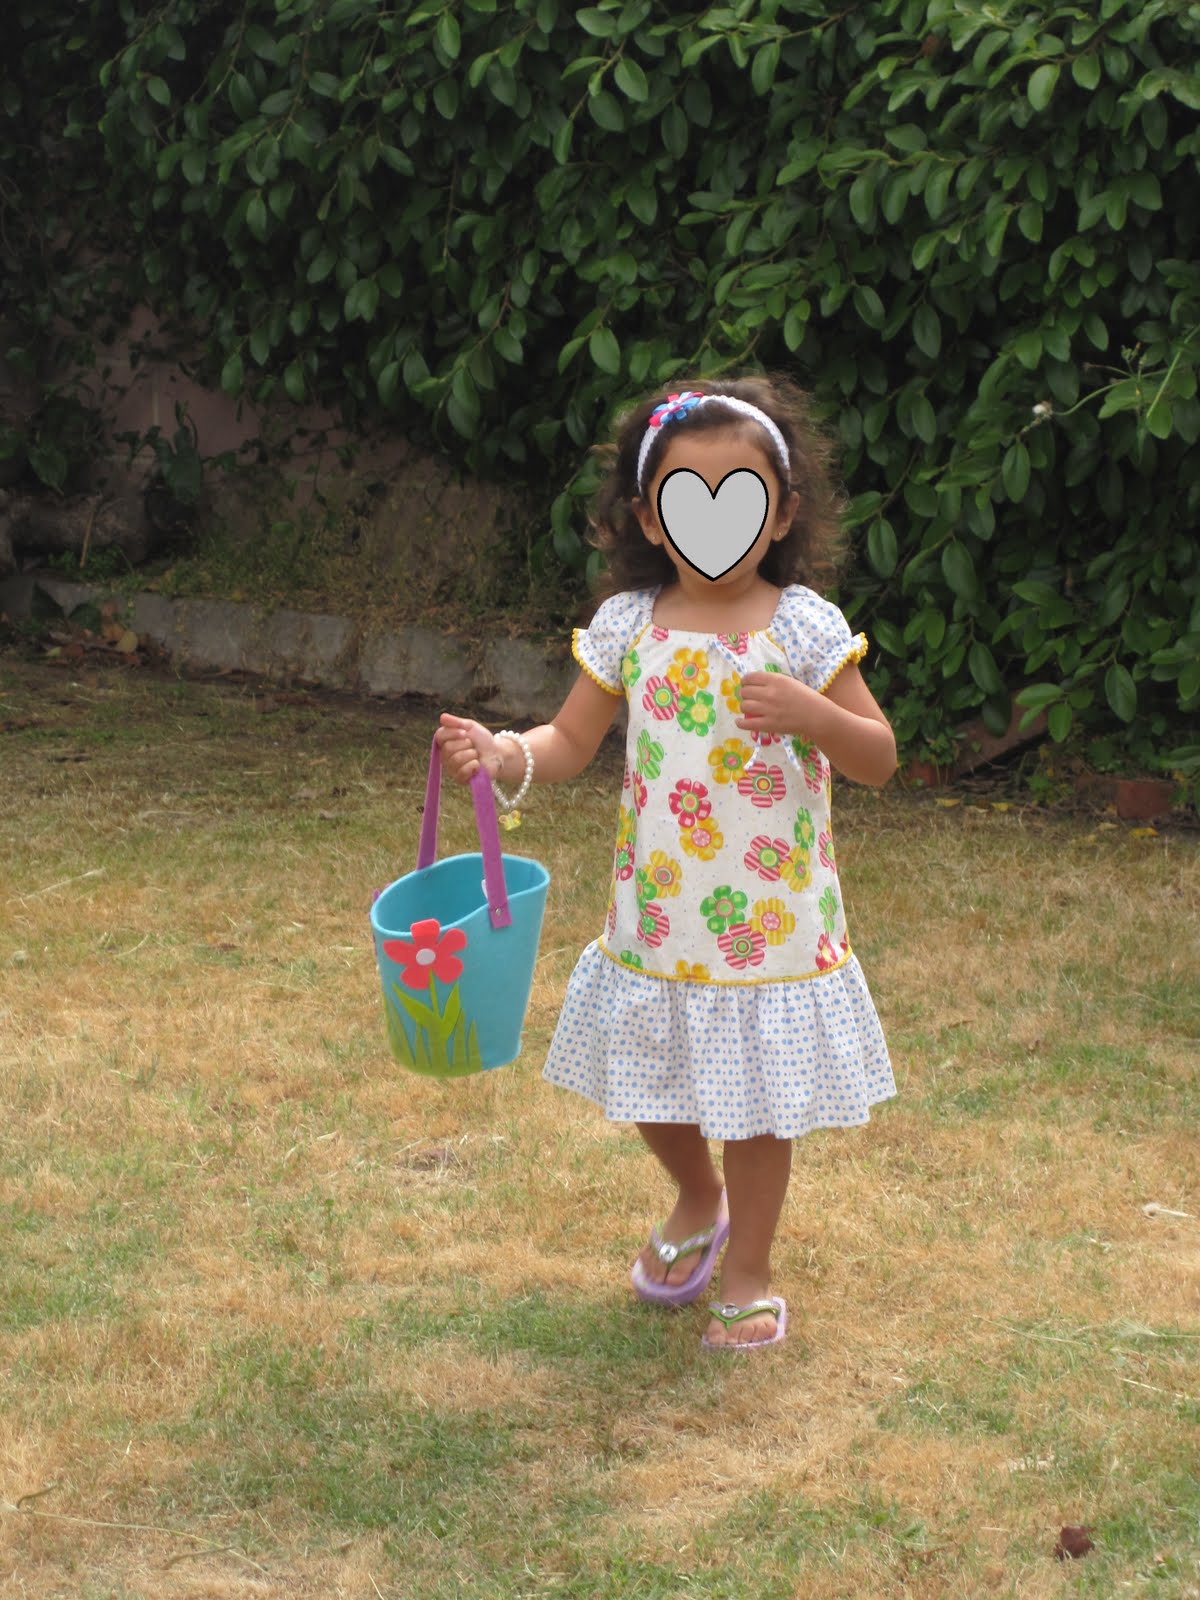
Lil' AC loves wearing "pretty dresses". She's constantly telling me she wants me to make her a pretty dress just like this one or that one. Of course, I always try to comply. For this dress I used View D for the body of the dress but used View C sleeves. The pattern was very easy to sew and the directions were very straight forward. Here's how it turned out...

I had approximately 1/2 yard of each of the fabrics. I made a size 2 and there was some left over fabric (not a lot though!). From the photo, you can tell that I used one fabric for the hem, sleeves and bow. I also added some yellow puff ball trim where the dress meets the ruffled hem, where the body meets the sleeves and at the edge of the sleeves.


The directions have you put the sleeves together first. I folded the hem up and then glue basted the trim in place. I did this because the trim had a very small seam allowance and it would of been tricky to attach the trim without basting it first. Once it was glue basted in, I used my zipper foot to sew close to the yellow trim. If you've never used Sewline Fabric Glue Pen, you must try it. The more I use it, the more I find new uses for it. I purchased my glue pen and an extra glue stick for $6. The actual glue stick part is light blue but it dries clear and is water soluble.

I glue basted the yellow decorative trim to the body before attaching the sleeves. I used a zipper foot to sew them together. Same steps for adding the ruffled hem and yellow decorative trim. If this does not make any sense, let me know and I will try to explain further.

In summary, I found the pattern to be quick and easy. The directions were easy to follow and there was only 3 different pattern pieces. The pattern also has tiered dress, View A. Think I'll make that next in a knit fabric.

Credo,
Lisa

Tuesday, March 22, 2011

Spring outfit - McCall's 5568

It's been way too long since my last post. I do apologize for that. Good news is that even though I have not been keeping my blog up to date, I have been sewing quite a bit. I'll be posting some of the projects I have completed.

Although it's been raining quite a bit lately, I've got SPRING fever. I've been sewing up breezy outfits for lil' AC. I've had McCall's 5568 for quite some time.

 I wanted to use up more of that $2 seersucker fabric I picked up at JoAnn's. I've written a complete pattern review here too. I selected view B and H. However, I wanted to make view H, pants and not capris. Lil' AC is thin but a bit tall. I added 4" to the capri pants to make them full length. In retrospect, I probably should of gone with adding 5" to create a more substantial hem. However, it will work as is. The instructions for the capris were ok. I would of put the waistband together a little differently but I like to follow the directions the 1st time around. When I make the capris again, I will improvise on the waistband. In general, the instructions and pattern pieces for the capris were ok. I added the band w/rickrack towards the bottom of the pants to match the top.

 The top, on the other hand, was  a different story. I have never seen such a convoluted way to attach a collar before. If you follow the directions exactly, it will come out but you have to be very precise with your seam allowance. I'm never one to suggest using your own method to complete a pattern for the very 1st time. I really believe you need to follow the instructions the 1st time around. When you make the garment for the 2nd time, that's when I think you should use whatever method works best for you. HOWEVER, in this situation... if you have ever put together a collar like this one, use your method and do not follow the instructions. Trust me on this one! I also added some purple rickrack to the pockets and all the way around the collar.


I hope you find this pattern review helpful.

Credo,
Lisa