Hi!
I'm been organizing... My sewing room was in real need of some help. It took me several weekends of sorting, purging and organizing to get it in a reasonable state. I'm not done yet but the room is so much more usable and I don't have to clean up anything to start a sewing project. In the process, I learned a few things like... I honestly thought I didn't have a lot of fabric until I went to organize my fabric. It became very clear that I had too much sitting around and not being used. Surprisingly, I have way more fleece than I thought. We all know how bulky fleece can be. So, I'm on a mission to get rid of the fleece by sewing up whatever I can. Well, I'm not interested in making blankets out of the fleeced but just about anything else will probably work. Got any ideas for fleece sewing projects? Leave me a comment. I would love to hear your ideas. Well... I've had this cute little jacket pattern, McCall's 5697, which I had bought to use with some cute corduroy fabric.
Well, instead I got out some grey fleece and went to work. I decided to do View B, with the elbow length and ruffle sleeves. The jacket is unlined. I found the instructions easy to follow. Since I used fleece fabric I wasn't concerned about finishing the edges, as fleece will not unravel and cause a messy hem. I do like finished seam and I'd like to try a french seam on my next attempt. I think I might try View D (long sleeves with button tabs). The fleece might be too bulky but for the thin corduroy fabric I have, a french seam might work. For the most part, I followed the directions. I did add a small black braided trim to the collar, sleeve hem, and pockets. I used approximately 65" of braid for a size 3T jacket. If you're going to buy trim for this jacket, I would just get 2 yards to ensure you have enough trim.
When I did the edge stitching, I did increase my Design Diamond stitch width to 4.5 because of the thick fleece. The longer stitch length seem to allow for a more defined edge stitch, meaning the stitch did not get lost in the fleece. Also, the jacket calls for 1 1/4" hem but I only did a 1" inch hem by simply folding up the bottom jacket edge. There just didn't seem a need to turn the hem under and tuck it in the hem allowance since I was using fleece. The only part I was not completely happy with was the lack of fullness in the sleeve ruffle. I'm not sure if the pattern was not sufficient to have a more substantial ruffle or if it is the fleece the inhibits the ruffle. If I were to make the fleece ruffled sleeve again, I think I would add more fabric to increase the ruffle. In general, I would recommend this pattern because it was fairly easy to put together, cute and there a lots of ways to make this jacket unique by adding trims/embellishments.
Credo,
Lisa
Tuesday, May 10, 2011
Monday, May 2, 2011
Beginner quilt - Free quilt pattern
Hi,
I was so thrilled when I found Pat Bravo's site. She's got a great fabric and pattern line. As I browsed her site, I found a free quilt pattern (Le Petite Garden) that I thought I could make fairly quickly.
Well, "fairly quickly" is a relative term when speaking about quilt making, right? The quilt was to be made as a gift. As always, I was short on time. The design seemed simple because there were no seams to match-up. No, points to connect. Just plain straight 1/4" seams. I was pretty sure I could do that successfully. I believe the beauty of the quilt can come from the fabric selection. The quilt is basically cut from 6.5" fabric strips. Although the pattern did not have any cutting layout instructions, it's straight forward to figure out because everything is based on that 6.5" strip. There are 6 different fabrics that are cut into 6.5" strips. The cotton fabric I selected is by Riley Blake Designs, Summer Song from My Mind's Eye. I loved it because it was bright, cheery and had bold colors.
I washed and dried my fabric before I began to make my strips and I'm glad I did. I measured the fabric to get a rough idea of how many pieces I could cut from each 6.5" strip of fabric. After the washing and drying, the width ranged from 40" to 42" and it was originally 44"/45" wide. Here's my guideline for cutting out the quilt pieces based on my washed/dried size (yours may differ):
I started making the quilt on a Tuesday night. I spent about 2 hours cutting the fabric out and getting it stacked and in the right order.
On Saturday, I spent almost 6 hours sewing the quilt top together. The directions were very clear but I decided to deviate slightly in hopes of speeding up the processes. I started by sewing the 38 blocks, as directed. I chain stitched the strips to produce the block. I placed one green strip on the button and then placed the center strip on top, centering the strips.
And then fed it through my sewing machine like so...
These blocks are used throughout the quilt, alternating between the remaining rectangles. All odd rows will use the large rectangles, (11"x 6.5") and will have 4 of these rectangles alternating between the 3-strip blocks using 3 3-strip blocks/row. For instance, all rows will begin with a cut rectangle (large or small) and then followed by the 3-strip block pictured above. The even rows will contain the 5 of the smaller (7 3/4" x 6.5") rectangles alternating with the 3-strip blocks using a total of 4 3-strip blocks. The rows are laid out as follows:
Row 8: F, C, H, D, F (7 3/4" x 6.5")
Row 9: G, F, C, D (11"x 6.5")
Row 10: B, H, E, H, G ( 7 3/4" x 6.5")
Row 11: F, G, B, C (11"x 6.5")
I stacked up all my rows and started to sew the blocks so that the block was on the right side:
My rows started to look like this:

Credo,
Lisa
I was so thrilled when I found Pat Bravo's site. She's got a great fabric and pattern line. As I browsed her site, I found a free quilt pattern (Le Petite Garden) that I thought I could make fairly quickly.
Well, "fairly quickly" is a relative term when speaking about quilt making, right? The quilt was to be made as a gift. As always, I was short on time. The design seemed simple because there were no seams to match-up. No, points to connect. Just plain straight 1/4" seams. I was pretty sure I could do that successfully. I believe the beauty of the quilt can come from the fabric selection. The quilt is basically cut from 6.5" fabric strips. Although the pattern did not have any cutting layout instructions, it's straight forward to figure out because everything is based on that 6.5" strip. There are 6 different fabrics that are cut into 6.5" strips. The cotton fabric I selected is by Riley Blake Designs, Summer Song from My Mind's Eye. I loved it because it was bright, cheery and had bold colors.
I started making the quilt on a Tuesday night. I spent about 2 hours cutting the fabric out and getting it stacked and in the right order.
On Saturday, I spent almost 6 hours sewing the quilt top together. The directions were very clear but I decided to deviate slightly in hopes of speeding up the processes. I started by sewing the 38 blocks, as directed. I chain stitched the strips to produce the block. I placed one green strip on the button and then placed the center strip on top, centering the strips.
And then fed it through my sewing machine like so...
When all the middle strips where gone, I knew it was time to stop my chain stitching (cut my thread) and take it to the ironing board and iron. My pile looked like this.
One more strip and the block is done.
The blocks end up looking like this
These blocks are used throughout the quilt, alternating between the remaining rectangles. All odd rows will use the large rectangles, (11"x 6.5") and will have 4 of these rectangles alternating between the 3-strip blocks using 3 3-strip blocks/row. For instance, all rows will begin with a cut rectangle (large or small) and then followed by the 3-strip block pictured above. The even rows will contain the 5 of the smaller (7 3/4" x 6.5") rectangles alternating with the 3-strip blocks using a total of 4 3-strip blocks. The rows are laid out as follows:
Row 1: B, F, C, G (11"x 6.5")
Row 2: G, D, B, F, C (7 3/4" x 6.5")
Row 3: F,C, H, B (11" 6.5"0
Row 4: D, G, C, H, D (73/4" x 6.5")
Row 5: G, H, F, B (11"x 6.5")
Row 6: H, F, D, G, C ( 7 3/4" x 6.5")
Row 7: C, B, C, H (11"x 6.5")
Row 8: F, C, H, D, F (7 3/4" x 6.5")
Row 9: G, F, C, D (11"x 6.5")
Row 10: B, H, E, H, G ( 7 3/4" x 6.5")
Row 11: F, G, B, C (11"x 6.5")
I stacked up all my rows and started to sew the blocks so that the block was on the right side:
I continued to take a rectangle from my sorted stack and sew a 3-strip block on the right. As I pulled a rectangle from my sorted stack, I checked the next size rectangle to see if it was a different size. If it was, that was my signal that the rectangle I had in my hand was the last one in the row and I needed to open what I had just sewn and sew that rectangle to the 3-strip block making sure the last rectangle in the row was sewn to the right of the 3-strip block.
My rows started to look like this:
When I was through with my sorted stack, I re-stacked my rows as I clipped the threads. My next pass was to completely connect each row, making sure to each rectangle sandwiched in between a 3-strip block.
In the end, this is what my finished quilt top looks like. Sorry about the poor photo.
Credo,
Lisa
Monday, April 4, 2011
How to sew a Colonial Dress
Hi!
Several days ago, my niece asked me to make her a colonial dress for her school's Colonial Day Celebration. She sent me the following picture as a guide.
When I saw this, it reminded me of the Cinderella dress I saw Ashley create over at Make It and Love It. I followed Ashley's lead and this is how my niece's Colonial dress turned out:
And here's a view without the apron...
I folded the t-shirt in half and traced around the edges. I did fold back the sleeve to get just the bodice portion. Sorry, I didn't take a photo of that. From this next shot, hopefully, you will get the idea.
Please excuse the "extra" green markings. Lil' AC was "helping" me create this pattern and made her marks. You can see where I added the extra 1" to the side seam to accommodate for the give in the knit t-shirt. This will actually give 2 extra inches to the pattern. Remember, I have not added in seam allowance yet. I just traced the t-shirt and added 1" to the side seam to compensate for the stretchy knit t-shirt I used.
From this photo, you can also see that I folded back the neckline, to trace the lower front of the t-shirt.
I decided that I wanted to shave off 1" at the bottom. To do this, I took my white fabric (which I had already squared up) and folded it in half. I lined up the top of my ruler at 2.5" and the bottom at 2" and cut using my rotary cutter.
I centered my white fabric with the dress and sewed the edges down. I then started to use my square ruler to layout the white braided trim.
On my Designer Diamond, I used stitch #13 with 5.0 width and 10.0 length to sew the braid in place. This stitch makes a zig zag pattern out of several straight stitches.
Now, here's where I deviated from Ashley. I sewed a zipper in the back. If your zipper comes in a package, then you should have instructions on how to add the zipper. Very briefly, to add my zipper, I sewed a basting seam all the way down the back where the zipper would go. I then took my zipper and lined up the top with the neckline. Using a zipper foot, I basted the zipper in place by creating a basting seam down the 2 edges of the zipper (making sure not to sew close to the teeth of the zipper.) and I basted the zipper in with the wrong size up. I then flipped the front over and used my zipper foot to get close to the zipper teeth to permanently sew the zipper in. Once the zipper was in, I pulled out the basting stitches. I then sewed the back and front of the bodice at the shoulder seam. I then added the little lace ruffle to the neckline which finished the neck edge seam.
Next, I created a sleeve pattern. If you've never created a sleeve pattern, take a look at this. I kinda of followed the way they made a pattern. I figured out what my arm hole depth was for the dress (9").
I also knew that my sleeve had to be at least 13" wide (around the bicep) and 4" down from the underarm point to hit the elbow. I then created a rectangle that was 13" tall by 7.5" wide. To get the height of my rectangle, I took the armhole depth (9") and added it to the elbow length. This gave me 13". My bicep measurement was 13". Since my pattern was going to be cut on the fold to ensure symmetry, my rectangle width had to be 1/2 the bicep (13/2=7.5). I then marked 9" down the height of my rectangle to accommodate the armhole depth. I then added my sleeve curve by free handing a slope down to the 9" mark. Like so...
I cut the sleeve pattern on the fold. For the white ruffle that begins just above the elbow, I cut 2 rectangles that were 5" tall by 20" wide. On one of the long edges (20"), I added the same lace ruffle that's on the neckline. I then gathered up the opposite end by sewing a long straight stitch and adjusting the gathers. I then sewed the gathered end to the bottom of the sleeve. I did the same to the remaining sleeve and then sewed the side seams. That finished the bodice portion. The skirt was the easiest part. I just used the remaining part of the fabric by sewing a tube and then gathering one end. I lined up the skirt seam with the back zipper seam and attached the skirt to the bodice.
Fabric:
Credo,
Lisa
Several days ago, my niece asked me to make her a colonial dress for her school's Colonial Day Celebration. She sent me the following picture as a guide.
When I saw this, it reminded me of the Cinderella dress I saw Ashley create over at Make It and Love It. I followed Ashley's lead and this is how my niece's Colonial dress turned out:
And here's a view without the apron...
I started out just as Ashley suggested, I used one of my niece's tops as a pattern. Since it was a knit t-shirt, I did add 1" to the side seam. The fabric I used was left-over Halloween fabric. It has some give but not as much as knit. Because my niece is not a petite girl, I was very generous when adding to the side seams. That stretchy knit made me nervous and I knew I needed to account for it when making the dress. I figured, I'd rather have it be too big (and she could gather it up with the apron) then have it be too small/tight. Here's how I started:
I folded the t-shirt in half and traced around the edges. I did fold back the sleeve to get just the bodice portion. Sorry, I didn't take a photo of that. From this next shot, hopefully, you will get the idea.
Please excuse the "extra" green markings. Lil' AC was "helping" me create this pattern and made her marks. You can see where I added the extra 1" to the side seam to accommodate for the give in the knit t-shirt. This will actually give 2 extra inches to the pattern. Remember, I have not added in seam allowance yet. I just traced the t-shirt and added 1" to the side seam to compensate for the stretchy knit t-shirt I used.
From this photo, you can also see that I folded back the neckline, to trace the lower front of the t-shirt.
I used the same pattern for the front and back of the bodice. Here's a close up
The original front neckline is in green marker. However, I needed a square front neckline. I just drew in a square neckline matching the end points of the original t-shirt. The back of the bodice was NOT cut on the fold. I added 1" to the back seam to allow for a zipper. Ashley used Velcro but I thought a zipper would be better for my niece. I did not add any seam allowance for the neckline because I was going to add a ruffle and I knew the seam allowance on that was about 1/4". I did add 1/2 " to the shoulder, arm and side seams.
The front of the bodice was cut on the fold and 1/2" seam allowance was added to the shoulder, arm and side seams. . I also cut out the square piece to accurately cut out the front bodice.
To make the white front on the bodice, I measured the length of my square bodice. In this instance is was approximately 5" (2.5 * 2).
I centered my white fabric with the dress and sewed the edges down. I then started to use my square ruler to layout the white braided trim.
On my Designer Diamond, I used stitch #13 with 5.0 width and 10.0 length to sew the braid in place. This stitch makes a zig zag pattern out of several straight stitches.
Now, here's where I deviated from Ashley. I sewed a zipper in the back. If your zipper comes in a package, then you should have instructions on how to add the zipper. Very briefly, to add my zipper, I sewed a basting seam all the way down the back where the zipper would go. I then took my zipper and lined up the top with the neckline. Using a zipper foot, I basted the zipper in place by creating a basting seam down the 2 edges of the zipper (making sure not to sew close to the teeth of the zipper.) and I basted the zipper in with the wrong size up. I then flipped the front over and used my zipper foot to get close to the zipper teeth to permanently sew the zipper in. Once the zipper was in, I pulled out the basting stitches. I then sewed the back and front of the bodice at the shoulder seam. I then added the little lace ruffle to the neckline which finished the neck edge seam.
Next, I created a sleeve pattern. If you've never created a sleeve pattern, take a look at this. I kinda of followed the way they made a pattern. I figured out what my arm hole depth was for the dress (9").
I also knew that my sleeve had to be at least 13" wide (around the bicep) and 4" down from the underarm point to hit the elbow. I then created a rectangle that was 13" tall by 7.5" wide. To get the height of my rectangle, I took the armhole depth (9") and added it to the elbow length. This gave me 13". My bicep measurement was 13". Since my pattern was going to be cut on the fold to ensure symmetry, my rectangle width had to be 1/2 the bicep (13/2=7.5). I then marked 9" down the height of my rectangle to accommodate the armhole depth. I then added my sleeve curve by free handing a slope down to the 9" mark. Like so...
I cut the sleeve pattern on the fold. For the white ruffle that begins just above the elbow, I cut 2 rectangles that were 5" tall by 20" wide. On one of the long edges (20"), I added the same lace ruffle that's on the neckline. I then gathered up the opposite end by sewing a long straight stitch and adjusting the gathers. I then sewed the gathered end to the bottom of the sleeve. I did the same to the remaining sleeve and then sewed the side seams. That finished the bodice portion. The skirt was the easiest part. I just used the remaining part of the fabric by sewing a tube and then gathering one end. I lined up the skirt seam with the back zipper seam and attached the skirt to the bodice.
Fabric:
- 2 yards of brown Halloween fabric that was 60" wide
- remnant piece of white fabric for center of bodice and sleeves. The fabric was also 60" wide but I probably only a little over 1/3 of a yard.
- The apron is made out of osnaburg.
Credo,
Lisa
Thursday, March 31, 2011
The little gathered clutch purse
Hi there!
I saw this great little clutch tutorial that Anna from Noddlehead created and fell in love with it. You must visit Anna's site, it's packed full of great stuff. Here's the link for her great tutorial. I added a strap to mine but that's the only change I made. Also, I used things I had on hand. My zipper was longer then the one Anna calls for. I just clipped off the bottom end to make it work. The one tip I think is important to note is that having your zipper portion (with the tabs included) be exactly 8.5" because the fabric pieces are cut to work with that length. She has this in bolded type but I thought it was worth mentioning again. So, here's my little gathered clutch purse... The front
Credo,
Lisa
I saw this great little clutch tutorial that Anna from Noddlehead created and fell in love with it. You must visit Anna's site, it's packed full of great stuff. Here's the link for her great tutorial. I added a strap to mine but that's the only change I made. Also, I used things I had on hand. My zipper was longer then the one Anna calls for. I just clipped off the bottom end to make it work. The one tip I think is important to note is that having your zipper portion (with the tabs included) be exactly 8.5" because the fabric pieces are cut to work with that length. She has this in bolded type but I thought it was worth mentioning again. So, here's my little gathered clutch purse... The front
The back:
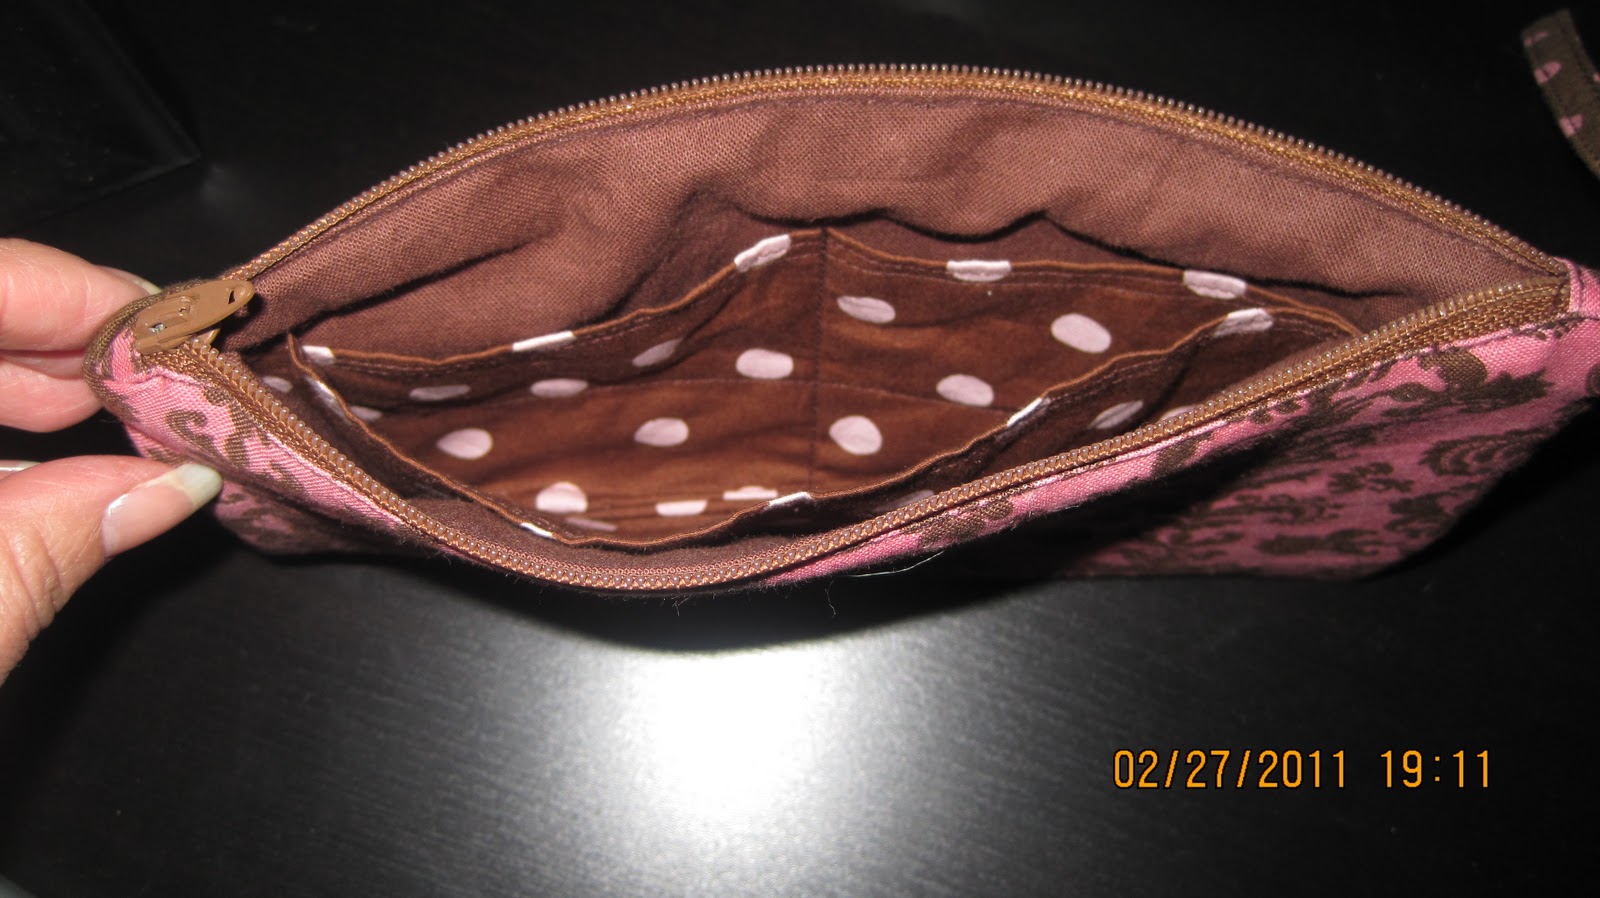
Inside:
There were 2 credit card slots and a divider down the middle:
Credo,
Lisa
Subscribe to:
Posts (Atom)