Pinterest

Thursday, March 31, 2011

The little gathered clutch purse

Hi there!

  I saw this great little clutch tutorial that Anna from Noddlehead created and fell in love with it. You must visit Anna's site, it's packed full of great stuff. Here's the link for her great tutorial. I added a strap to mine but that's the only change I made. Also, I used things I had on hand. My zipper was longer then the one Anna calls for. I just clipped off the bottom end to make it work. The one tip I think is important to note is that having your zipper portion (with the tabs included) be exactly 8.5" because the fabric pieces are cut to work with that length. She has this in bolded type but I thought it was worth mentioning again. So, here's my little gathered clutch purse... The front

The back:


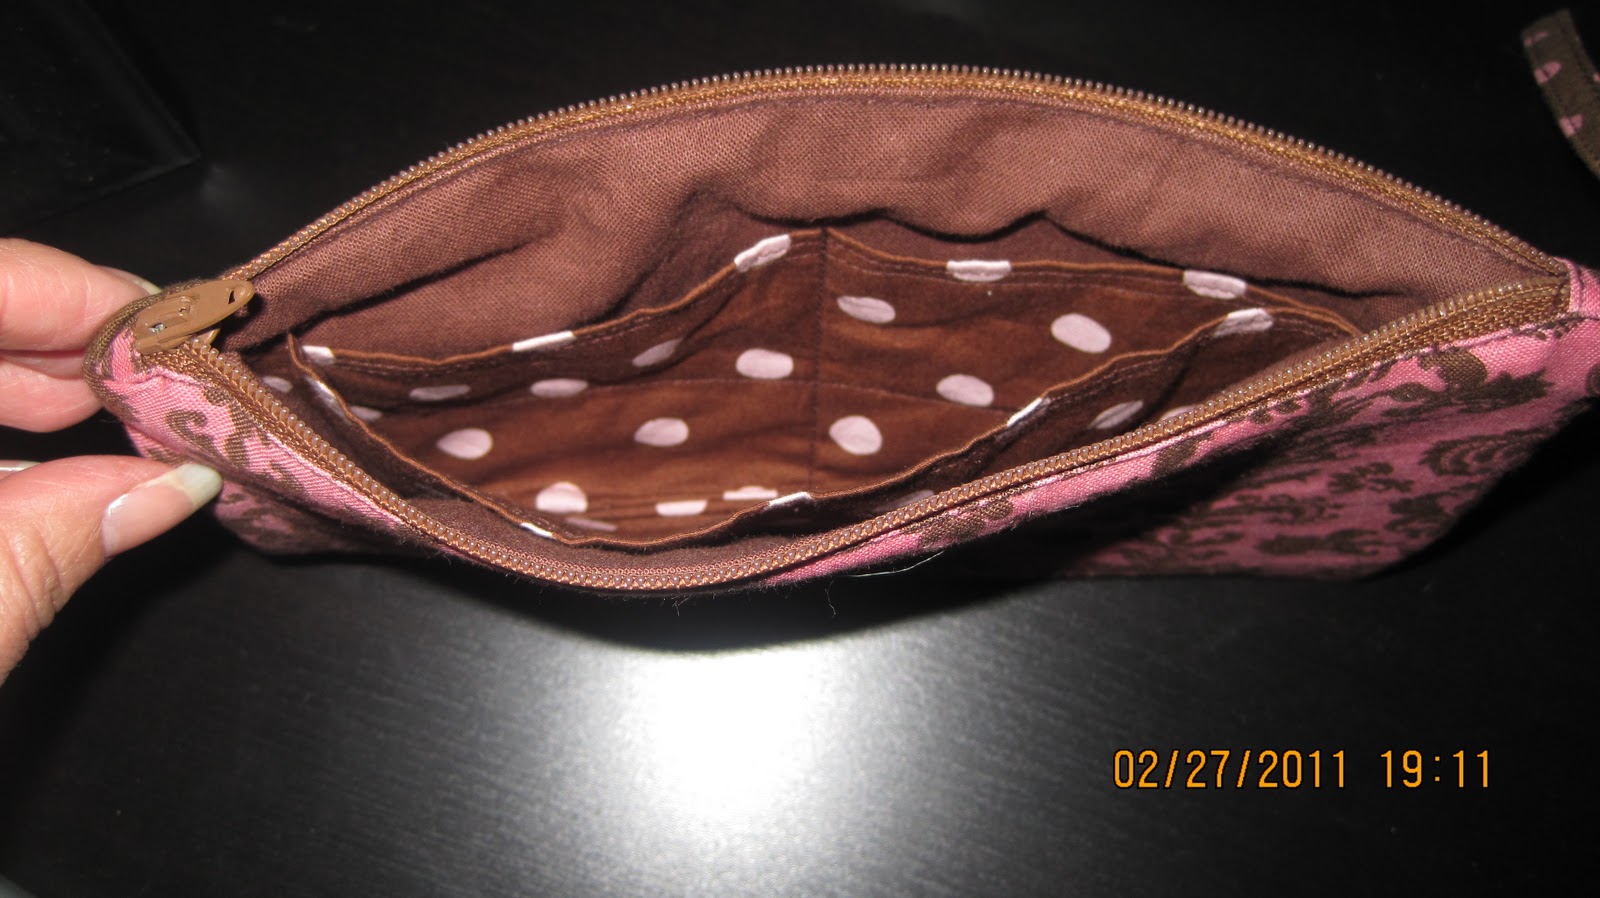
Inside:


There were 2 credit card slots and a divider down the middle:

Credo,
Lisa

Wednesday, March 23, 2011

Toddler Dress - Simplicity 5695

Hello!

  I just finished using Simplicity 5695 to make a summery dress for lil' AC.

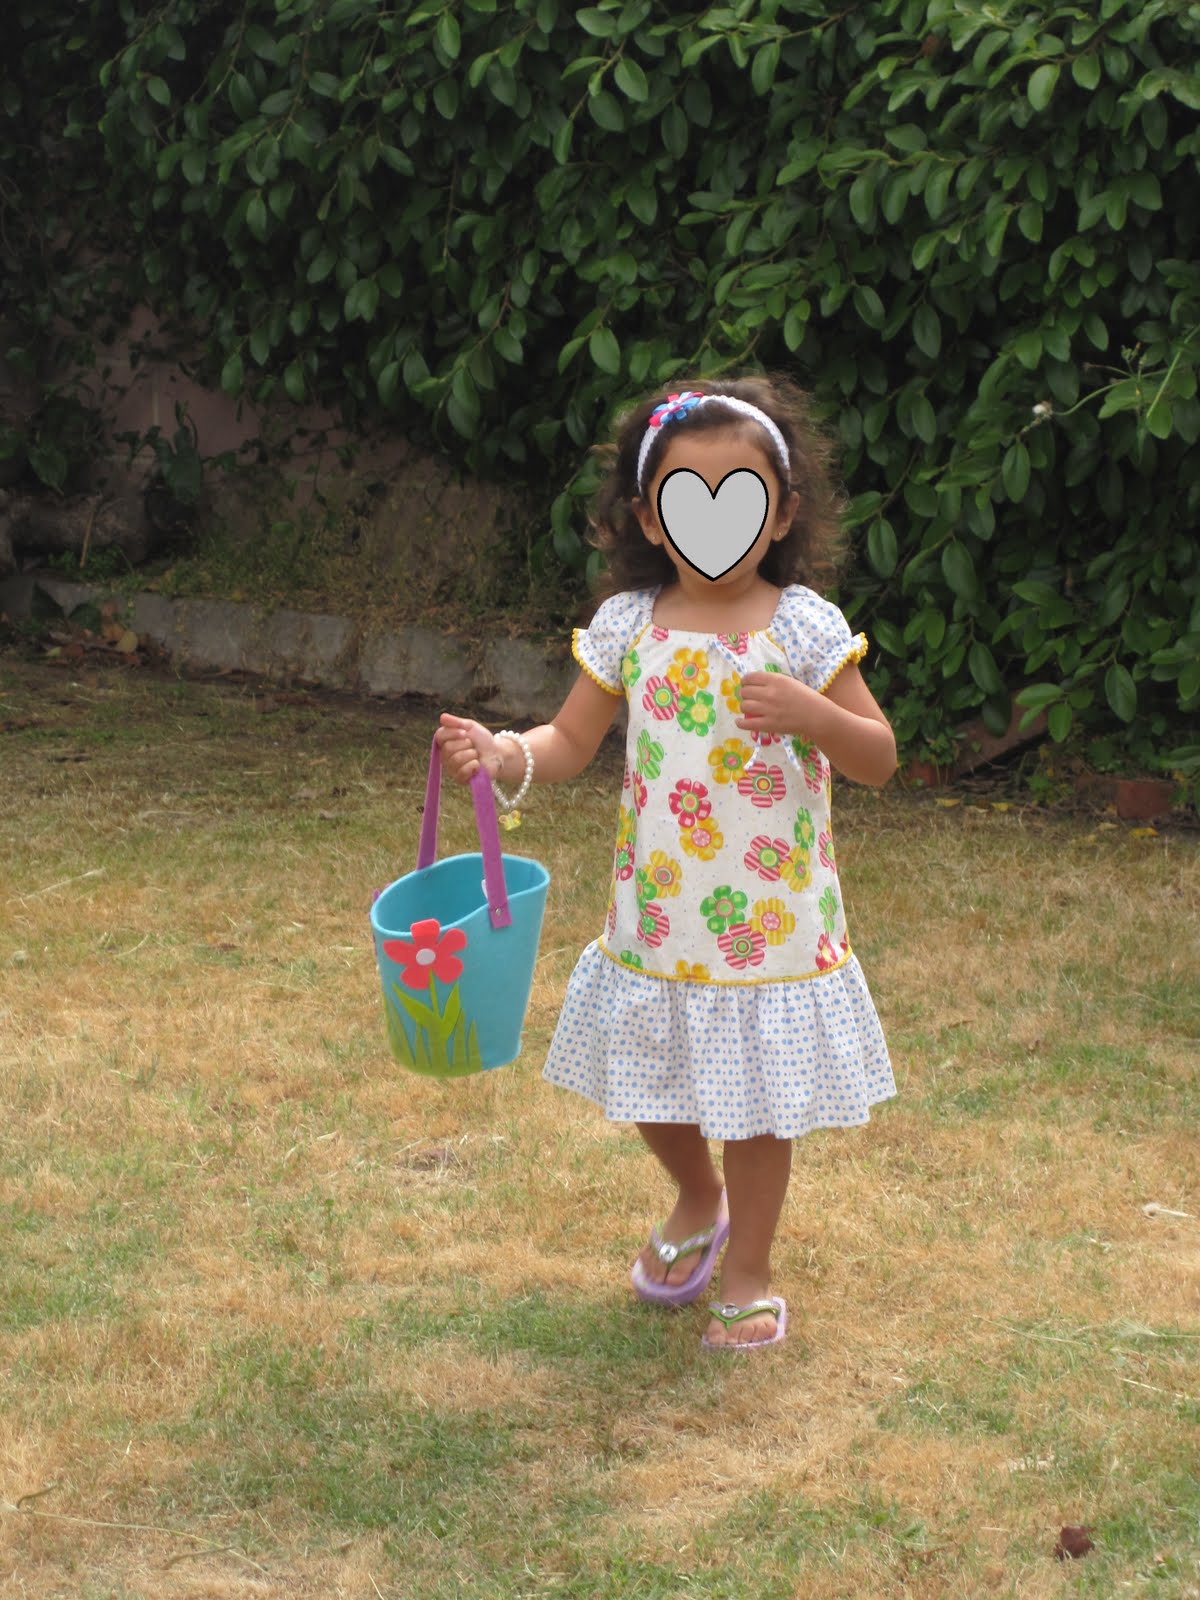
Lil' AC loves wearing "pretty dresses". She's constantly telling me she wants me to make her a pretty dress just like this one or that one. Of course, I always try to comply. For this dress I used View D for the body of the dress but used View C sleeves. The pattern was very easy to sew and the directions were very straight forward. Here's how it turned out...

I had approximately 1/2 yard of each of the fabrics. I made a size 2 and there was some left over fabric (not a lot though!). From the photo, you can tell that I used one fabric for the hem, sleeves and bow. I also added some yellow puff ball trim where the dress meets the ruffled hem, where the body meets the sleeves and at the edge of the sleeves.


The directions have you put the sleeves together first. I folded the hem up and then glue basted the trim in place. I did this because the trim had a very small seam allowance and it would of been tricky to attach the trim without basting it first. Once it was glue basted in, I used my zipper foot to sew close to the yellow trim. If you've never used Sewline Fabric Glue Pen, you must try it. The more I use it, the more I find new uses for it. I purchased my glue pen and an extra glue stick for $6. The actual glue stick part is light blue but it dries clear and is water soluble.

I glue basted the yellow decorative trim to the body before attaching the sleeves. I used a zipper foot to sew them together. Same steps for adding the ruffled hem and yellow decorative trim. If this does not make any sense, let me know and I will try to explain further.

In summary, I found the pattern to be quick and easy. The directions were easy to follow and there was only 3 different pattern pieces. The pattern also has tiered dress, View A. Think I'll make that next in a knit fabric.

Credo,
Lisa

Tuesday, March 22, 2011

Spring outfit - McCall's 5568

It's been way too long since my last post. I do apologize for that. Good news is that even though I have not been keeping my blog up to date, I have been sewing quite a bit. I'll be posting some of the projects I have completed.

Although it's been raining quite a bit lately, I've got SPRING fever. I've been sewing up breezy outfits for lil' AC. I've had McCall's 5568 for quite some time.

 I wanted to use up more of that $2 seersucker fabric I picked up at JoAnn's. I've written a complete pattern review here too. I selected view B and H. However, I wanted to make view H, pants and not capris. Lil' AC is thin but a bit tall. I added 4" to the capri pants to make them full length. In retrospect, I probably should of gone with adding 5" to create a more substantial hem. However, it will work as is. The instructions for the capris were ok. I would of put the waistband together a little differently but I like to follow the directions the 1st time around. When I make the capris again, I will improvise on the waistband. In general, the instructions and pattern pieces for the capris were ok. I added the band w/rickrack towards the bottom of the pants to match the top.

 The top, on the other hand, was  a different story. I have never seen such a convoluted way to attach a collar before. If you follow the directions exactly, it will come out but you have to be very precise with your seam allowance. I'm never one to suggest using your own method to complete a pattern for the very 1st time. I really believe you need to follow the instructions the 1st time around. When you make the garment for the 2nd time, that's when I think you should use whatever method works best for you. HOWEVER, in this situation... if you have ever put together a collar like this one, use your method and do not follow the instructions. Trust me on this one! I also added some purple rickrack to the pockets and all the way around the collar.


I hope you find this pattern review helpful.

Credo,
Lisa

Wednesday, July 28, 2010

Seersucker Bathing Suit

 The Sew Beautiful magazine has a fabulous toddler bathing suit in their May/June 2010 issue. It's a toddler two piece suit by Jackie Young. Plus the pattern and instructions was included in the magazine! I believe the pattern size ranged from 6 months - 4T. I thought it was adorable and it looked quick and easy. Of course by the time I saw it, the magazine had already been pulled off the shelf and the new issue was only available. Well, we were going to the beach and there was no time to buy the issue from Martha Pullen's site. There are some great pictures of the bathing suit on their Sew Beautiful blog. There are so many talented sewers out there. This one helped me the most because I could see the side view. I used one of lil' AC blouses to make a pattern for the top. I figured it didn't have to be perfect because there are ties to hold everything in place. Plus, I had purchased some inexpensive seersucker fabric at JoAnn's for $2 a yard. The bathing suits in Sew Beautiful magizine used really good quality seersucker but that can also be a little scratchy, in my opinion. From some of the photos on the blog, it seems clear that all the bathing suits were lined with a softer fabric (maybe cotton). Since my cheap seersucker was a bit thin and would only seem thinner when wet, I decided to just line the suit with the same seersucker. Seemed easier. For the bottoms, I just used a diaper cover pattern I already had. Here's the final product:
 For the ruffle, I used a print which had strawberries and watermelon. I honestly just used only things that I had at home because I was working on it late at night. (Typical, for me!) I only had enough of the mini rick-rack in red but I don't think I'd used the medium size for the bathing suit. The design is busy enough. I also did not have any matching blue thread, so I justed used red. I think it turned out fine. My mom even thought I did it that way on purpose. Nope... just used what I had on hand. Because I lined the suit, I probably used about total of 1 yard of fabric to make a 2T suit. That's about $4 for the suit. Not, bad! The monogram came from a free font website. I believe the font is called Baroque Script. I imported the font using my 4D software. Once the font was in 4D, it was easy to do the embrodiery on my Designer Diamond. I embroidered  the top part and then added the lining so nothing scratchy touched the skin. It was a fun and quick project.

Credo,
Lisa

Tuesday, May 11, 2010

Lorelei Apron and Simplicity 2492

Although I've made many aprons, I still having fun making aprons for friends and family. I think the book A Is for Aprons is great apron eye candy. I just wish the directions were better. A few weeks ago the Simplicity patterns were $1.99 at Joann's. As I was going through the pattern book, I found Simplicity 2492 which is a slight modification of the Lorelei apron from A Is for Aprons.
PLUS, the Simplicity pattern comes in adult and children's sizes. The book only has one size. Since the Lorelei was one of my favorites that I made as a Christmas gift, I wanted to make a matching set for me and lil' AC. I didn't mind spending $1.99 for the pattern and I hoped the Simplicity directions would fill in the gaps the book had. I'm looking for the right fabric to make those matching aprons. Even though I don't have the right fabric, that pattern was calling me! Turns out that my mom is the only one I hadn't made an apron for. (And she had actually asked for one for Christmas! I know. I know! Bad daughter!!) For mother's day, I decided to make her the Lorelei/Simplicity 2492. I used the pattern pieces from the book but used the Simplicity instructions. I took me about 2.5 hours to make the apron and I did not rip out one seam! The Simplicity instructions helped tremedously. Here's my mom's Mother's Day Apron.


The book instructions for adding the rick rack and bias tape where not clear to me. The Simplicity instructions were very straight forward to me. This is the portion I'm talking about

The neck area of the aprons are different from the book and the Simplicity pattern. I like the non-tie neck in the book.  Here's a close up of the back of the Simplicity pattern. You can see the pattern details a little better.

The Simplicity pattern also give you patterns for pot holders, sachet and some felt food (cookies).

Credo,
Lisa

Saturday, May 8, 2010

Flower Ribbon Corsage - quick Mother's Day gift

When I saw this at V and Co, I thought they were adorable. Plus, one would be perfect for my mom's new handbag. They are simple and quick to make. The 1st one took me about 15 minutes to complete. I thought they were pretty cute and took almost no time at all to put together. Good combination for me! So, I decided to make one for every mom I will be seeing on Mother's Day. The added bonus is that I had all the stuff on hand. V and Co, has excellent directions here. I only had satin wired ribbon on hand. Have you ever bought wired ribbon from Costco? You get a lot of yardage (50 yards, to be exact) for some where around 8 bucks. I have all kinds of Costco ribbon and that's what I used for all my flowers. The Costco ribbon I used were all 1.5" wide. I think I like the wired ribbon because I could shape the flower petal so that they curved up more and the petals held their shape fairly easily due to the wire. Here's a sample of how mine turned out:


I already had some pin backs and glued those on.


My favorite is probably the poka dot ribbon. I can see this not only as a corsage but since it has a pin back, I can put it on one of lil' ACs hair bands to dress it up. V and Co, had some great photos of different things you can do with your ribbon corsage. Be sure to check out her website here.


Credo,
Lisa

Friday, May 7, 2010

Simple method to hoop your fabric

I do love to use my embroidery feature on my Designer Diamond. My least favorite part is hooping the fabric and getting it perfectly aligned. Well... that was until I learned a hoop-less technique from a class I took from Michelle Griffith. Michelle taught us how to hoop using sticky stabilizer. Personally, I use Floriani Perfect Stick which has one sticky/adhesive side and I have always had good results. Here's how I "hoop" my fabric. Choose the hoop you want to use and take the inner ring out. Trace the inner ring onto the Perfect Stick stablilizer and then cut out. Remove a portion of the sticky back and place the hoop over the exposed adhesive so that the stabilizer adheres to the inner hoop. Once you are happy with the positioning, remove the rest of the stabilizer and adhere to the rest of the hoop. I like to adhere the top edge and 2 corners first. Once that's smooth, I will then remove the rest of the liner exposing the remaining adhesive and lightly stretch the stabilizer to cover the remaining hoop. Here's what the back of the hoop looks like:
The above photo shows the inner hoop already placed in the outter hoop. You can see that the Perfect Stick stabilizer does not cover every inch of the inner hoop. The other/front side has the sticky portion exposed. This allows the fabric to be placed onto the hoop and makes for aligning the fabric very easily. In fact, you can move the fabric around quite a bit without losing the tackiness on the stabilizer. Here's a "hooped" piece of fabric.


From the photo, you can see that my fabric doesn't even touch the sides of the inner hoop. It's just "floating" in the center of the sticky back adhesive. There is no sandwiching of fabric between the inner and out hoop. With fabric that is larger than the hoop, I just drape the fabric over the edges. Additionally, depending on the fabric, I have also slide another piece of tear away stabilizer under the hoop for added stability. I hope you find this hoop-less technique helpful. It would be great for velour or velvets where hoop burn maybe a concern. It's the only way I hoop these days.

Credo,
Lisa